
Shingling a roof is a critical aspect of home maintenance that not only enhances the aesthetic appeal of your house but also provides essential protection against the elements. If you’re asking yourself “how to shingle a roof?”, this comprehensive guide will walk you through the process of shingling a roof, detailing the necessary materials, costs, and step-by-step instructions to ensure a successful project.
- Understanding roof shingles
- Tools and materials needed for shingling a roof
- Estimating costs
- Preparing for installation
- 6-step shingling process
- Ensuring proper ventilation
- Final inspection and maintenance
- DIY vs. professional installation
- Safety precautions
🤔 Understanding Roof Shingles
Before diving into the shingling process, it’s important to understand what roof shingles are and their different types.
Types of Roof Shingles
Asphalt Shingles: The most common and economical choice, available in three-tab, dimensional, and luxury styles.
Wood Shingles: Made from cedar, redwood, or pine, offering a natural look but requiring more maintenance.
Metal Shingles: Durable and energy-efficient, made from steel, aluminum, or copper.
Slate Shingles: Highly durable and long-lasting but expensive and heavy.
Tile Shingles: Made from clay or concrete, offering a distinctive look and great durability.
🧰 Tools and Materials Needed for Shingling a Roof
To shingle a roof, you will need the following materials:
- Roofing Shingles: Choose the type that fits your budget and aesthetic preferences.
- Roofing Nails: Galvanized or stainless steel nails to prevent rusting.
- Roofing Felt (Underlayment): Provides an extra layer of protection.
- Ice and Water Shield: A self-adhering membrane that prevents water infiltration.
- Roofing Cement: Used for sealing around vents, chimneys, and other penetrations.
- Flashing: Metal strips used to seal joints and edges.
- Drip Edge: Metal strips along the roof’s edge to direct water away from the fascia.
- Ventilation Materials: Ridge vents, soffit vents, and other ventilation products.
Tools Required
- Hammer or Roofing Nail Gun: For fastening shingles.
- Utility Knife: For cutting shingles.
- Tape Measure: To ensure precise measurements.
- Chalk Line: To mark straight lines on the roof.
- Roofing Hatchet: A multi-purpose tool for cutting and nailing shingles.
- Ladder and Safety Gear: Harness, gloves, and safety glasses.
- Tarp: To protect your garden and landscaping from falling debris.
💵 Estimating Costs
The cost of shingling a roof can vary significantly based on the type of shingles, the roof’s size, and the complexity of the installation. Here’s a breakdown of potential costs:
Materials Cost:
- Asphalt Shingles: $100 to $150 per square (100 square feet).
- Wood Shingles: $400 to $700 per square.
- Metal Shingles: $300 to $600 per square.
- Slate Shingles: $600 to $1,500 per square.
- Tile Shingles: $400 to $1,000 per square.
Labor Cost:
- Professional installation typically ranges from $2 to $5 per square foot, depending on the complexity and your location.
Additional Costs:
- Underlayment and Ice and Water Shield: $50 to $100 per roll.
- Flashing and Drip Edge: $1 to $2 per linear foot.
- Ventilation: $10 to $20 per linear foot for ridge vents.
👇 Preparing for Installation
Proper preparation is key to a successful roof installation. Before beginning the shingling process, it’s essential to thoroughly inspect and prepare your roof to ensure a smooth and efficient installation. This section will cover the necessary steps to get your roof ready for new shingles.
Inspection and Preparation:
- Roof Inspection: Check the existing roof for damage, rot, or weak spots. Repair any issues before starting.
- Removing Old Shingles: Use a roofing shovel or a pry bar to remove old shingles and nails.
- Installing Drip Edge: Nail the drip edge along the roof’s perimeter to protect the sheathing.
Installing Underlayment and Ice and Water Shield:
- Underlayment: Roll out the underlayment, starting from the bottom edge of the roof, and staple or nail it in place.
- Ice and Water Shield: Apply this self-adhering membrane along the roof’s edges, valleys, and around penetrations to prevent water infiltration.
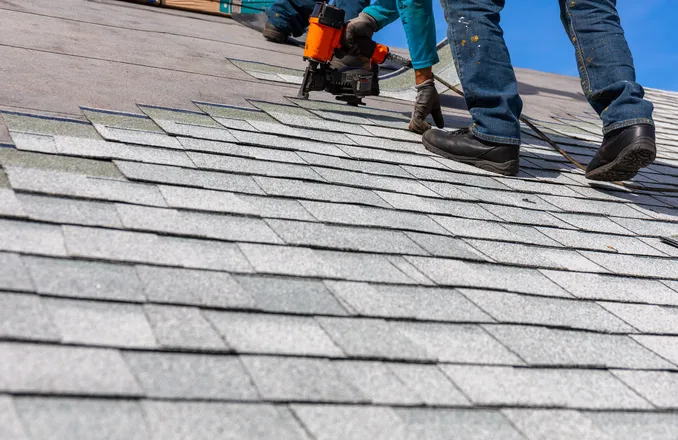
🛠️ 6-Step Shingling Process
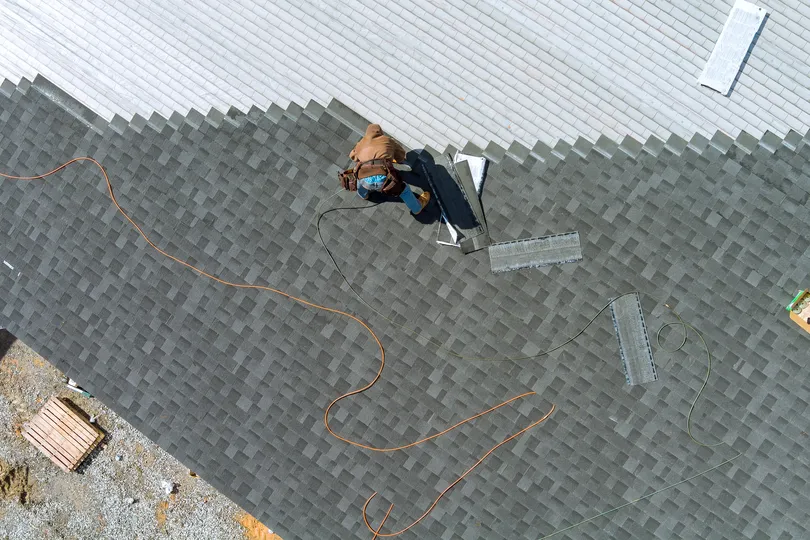
At TriStar Roofing, we believe in delivering precise and efficient shingling services to ensure optimal protection and aesthetic appeal for your home. Our streamlined 6-step shingling process is designed to provide a reliable and long-lasting solution for your roofing needs.
1. Laying the Starter Strip
- Begin with a starter strip at the roof’s edge. This provides a base for the first row of shingles and helps prevent water infiltration.
- Ensure the starter strip is properly aligned to create a solid foundation for the shingles.
- Secure the starter strip with roofing nails, placing them evenly along the strip to hold it firmly in place.
2. Installing the First Row of Shingles
- Start at the bottom edge of the roof and work your way up.
- Align the shingles with the starter strip and secure them with roofing nails. Place nails about 1 inch from the edges and 4-6 inches apart.
- Make sure the shingles overlap the starter strip slightly to create a seamless barrier against water and wind.
3. Continuing with the Next Rows
- Offset each row to ensure that the seams do not line up directly above each other. This staggered pattern increases the roof’s durability.
- Use a chalk line to keep rows straight, ensuring a professional and uniform appearance.
- Continue nailing shingles in place, maintaining the same spacing and alignment as the first row.
4. Cutting Shingles to Fit
- Use a utility knife to cut shingles to fit around edges, valleys, and roof penetrations.
- Measure the areas where shingles need to be cut to ensure a precise fit.
- Carefully trim the shingles, making sure to leave no gaps that could allow water to seep through.
5. Installing Flashing
- Install flashing around chimneys, vents, and other roof penetrations. This helps to seal these areas and prevent water infiltration.
- Properly fit the flashing to the contours of the roof and the penetrations.
- Secure the flashing with nails and seal the edges with roofing cement to create a watertight barrier.
6. Applying Ridge Cap Shingles
- Install ridge cap shingles along the roof’s peak. These shingles are designed to fit over the ridge and provide a finished look while protecting the peak from water infiltration.
- Ensure the ridge cap shingles overlap each other to form a continuous line along the peak.
- Nail the ridge cap shingles securely in place, and use additional roofing cement if needed to enhance the seal.
🌬️ Ensuring Proper Ventilation
Proper roof ventilation is crucial for maintaining the integrity of your shingles and extending their lifespan. Poor ventilation can lead to heat buildup and moisture problems, which can damage the shingles and underlying structure.
Types of Ventilation:
- Ridge Vents: Installed along the roof’s peak, allowing hot air to escape from the attic.
- Soffit Vents: Located under the eaves, allowing cool air to enter the attic.
- Gable Vents: Installed in the gable ends to provide additional airflow.
🔎 Final Inspection and Maintenance
After completing the shingling process, a thorough final inspection and ongoing maintenance are essential to ensure the roof’s longevity and performance. Regular inspections help identify potential issues early, allowing for timely repairs and preserving the roof’s integrity.
Final Inspection:
- After completing the shingling process, inspect the entire roof for any loose or misaligned shingles. Make necessary adjustments and ensure all nails are properly driven in.
Maintenance Tips:
- Regular Inspections: Inspect your roof annually and after major storms.
- Cleaning: Keep the roof free of debris, leaves, and moss.
- Gutter Maintenance: Ensure gutters are clean and free-flowing to prevent water backup.
- Prompt Repairs: Address any damage immediately to prevent further issues.
👨🔧 DIY vs. Professional Installation
When it comes to installing a new roof, homeowners often face the choice between doing it themselves or hiring a professional. Both options have their advantages and drawbacks, and making the right decision depends on various factors including budget, expertise, and the complexity of the project.
DIY Installation:
- Pros: Cost savings, personal satisfaction.
- Cons: Time-consuming, requires skill and safety measures.
Professional Installation:
- Pros: Expertise, efficiency, warranty on work.
- Cons: Higher cost, reliance on contractor availability.
🦺 Safety Precautions
Roof work is inherently dangerous. Follow these safety tips:
- Use a Safety Harness: Always wear a harness secured to a stable anchor point.
- Ladder Safety: Ensure the ladder is on stable ground and secured at the top.
- Weather Conditions: Avoid working on the roof in wet, icy, or windy conditions.
- Proper Footwear: Wear non-slip shoes to prevent falls.
🙌 Reliable Roofing Solutions with TriStar Roofing

Shingling a roof is a significant project that demands careful planning, the right materials, and attention to detail. At TriStar Roofing, our team of experienced professionals is dedicated to providing top-quality roofing services that you can trust. We ensure that every project is completed with precision and care, whether you need a new roof installation or maintenance. Understanding the process and costs involved is crucial, and our experts are here to guide you every step of the way. Choose TriStar Roofing to protect your home and enhance its curb appeal for many years to come. Contact us today for a free consultation and discover why we are the trusted choice for all your roofing needs!
