
Is your chimney struggling to keep water out of your home? Chimney flashing repair could be the solution you’re looking for. Not only can damaged flashing lead to leaks and costly repairs, but it can also affect the longevity of your roof. For homeowners, understanding the basics of chimney flashing and its repair is essential. In this guide, we’ll walk you through the importance of chimney flashing and more, including:
- What is chimney flashing?
- Preparing for repairs
- 5 steps to repair chimney flashing
- Preventing future issues
- Expert tips for effective repairs
🤔 What is Chimney Flashing?

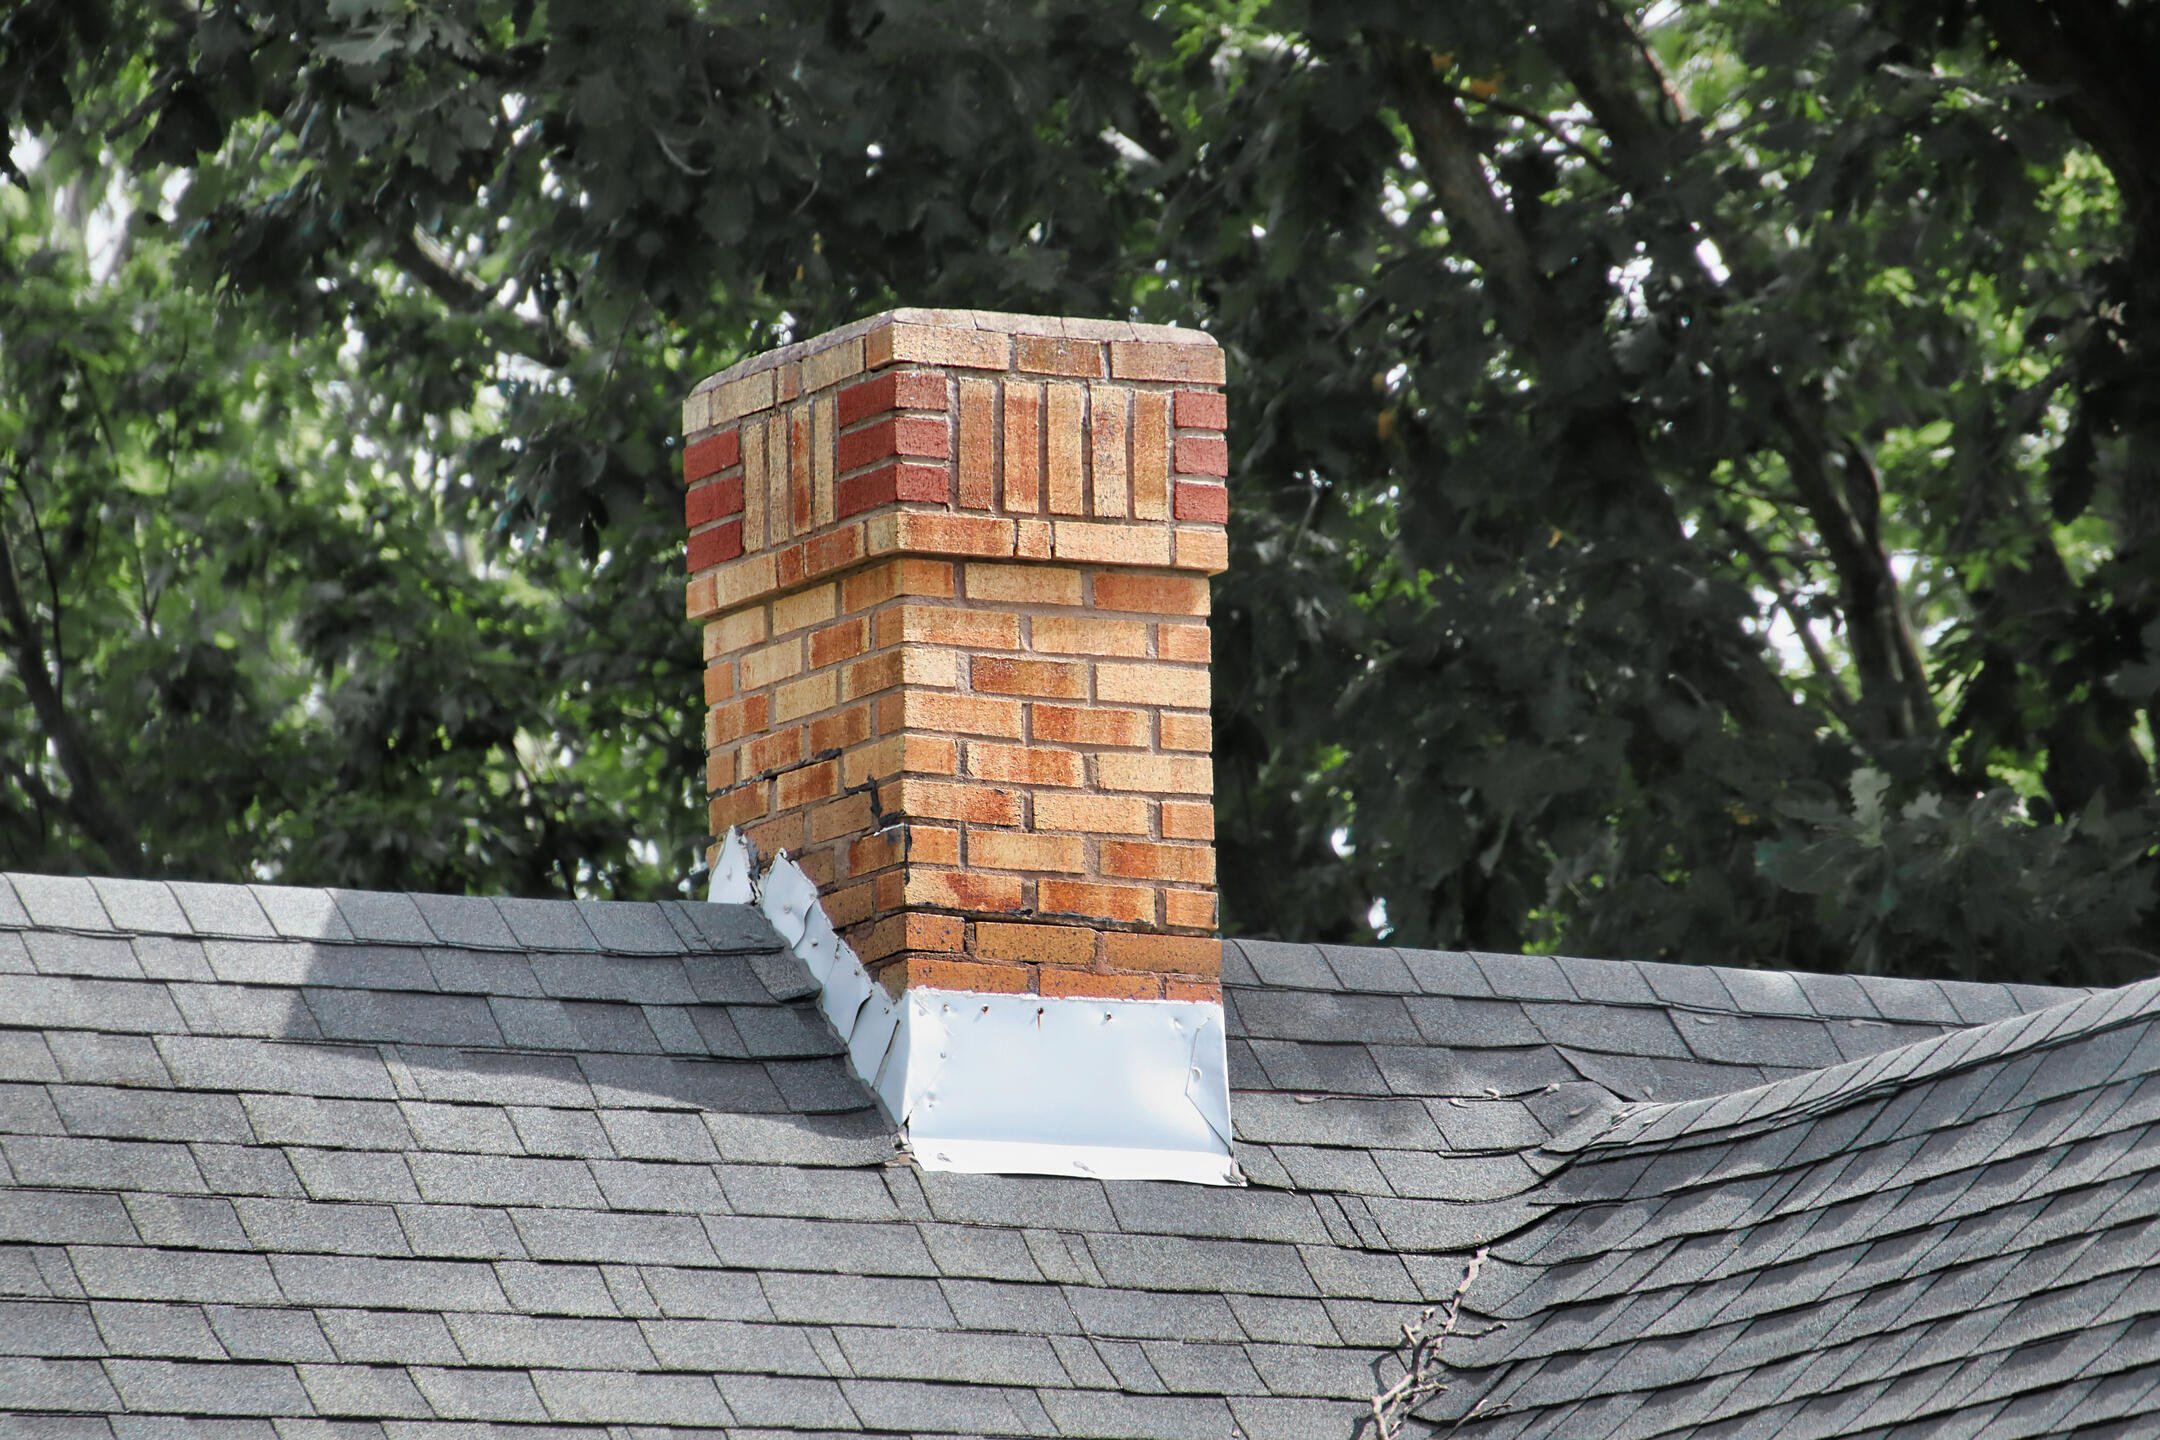
Chimney flashing is the protective seal that prevents water from seeping into the joint between your chimney and roof. Typically made from metal, such as aluminum or steel, it is installed in layers to create a watertight barrier. Flashing is essential because it safeguards your roof’s structural integrity; without it, water can lead to wood rot, mold, and other costly problems. Consider flashing as the silent guardian of your home’s chimney. Understanding how flashing works can help you identify when it requires attention, and regular inspections and maintenance will ensure it continues to protect your home effectively.
Common Causes of Flashing Damage
Flashing is designed to be durable, but several factors can lead to its deterioration:
- Weather: Constant exposure to rain, wind, and extreme temperatures can wear down the metal over time.
- Improper Installation: If flashing isn’t installed correctly, gaps can form, allowing water to penetrate. This is why hiring a professional for installation and repair is often recommended.
- Age: Like all roofing materials, flashing has a lifespan. Once it reaches the end of its life, it becomes less effective at keeping moisture out.
Recognizing When Repairs are Needed
Identifying the signs of damaged flashing can save you from bigger headaches down the road. Look for water stains on your ceiling or walls near your chimney, as this often indicates a leak. Additionally, examine the flashing itself; cracks, rust, or lifting edges are clear signs that repairs are needed. Keeping an eye on these indicators can help you catch problems early. Regular roof inspections are also beneficial, and ideally, you should inspect your roof and flashing twice a year, in spring and fall, to ensure everything is in good shape.
👉 Preparing for Repairs
Tools and Materials for DIY Chimney Flashing Repair
If you’re considering a DIY approach to chimney flashing repair, you’ll need the right tools, including:
- Ladder
- Hammer
- Caulking gun
- Metal snips
- Safety gear (gloves and goggles)
Materials vary depending on the repair, but common options include:
- Aluminum or steel flashing
- Roofing cement
Make sure to choose materials compatible with your existing roof and chimney. It’s also wise to have a helper—not only can they pass you tools, but they can also ensure your safety on the roof.
Professional Repair vs. DIY
Deciding between professional repair and DIY depends on your skills and the extent of the damage. Minor repairs can often be handled by handy homeowners with the right tools and materials; however, if you’re dealing with significant damage or if you’re not comfortable working at heights, hiring a professional is the safer option. Professional roofers have the experience and tools to ensure the job is done right, as improper repairs can lead to more serious issues down the line. If in doubt, consulting a professional can save you time and money.
🛠️ 5 Steps to Repair Chimney Flashing

Repairing chimney flashing is crucial because it prevents water leaks that can lead to significant structural damage in your home. Properly maintained flashing ensures your chimney functions effectively while protecting your roof and interior from moisture-related issues.
1. Assess the Damage
Begin by thoroughly inspecting your chimney flashing for any signs of wear and tear. Look for cracks, rust, gaps, or any other damage that might compromise its effectiveness. It’s also essential to check the surrounding areas for any signs of water damage or deterioration. Identifying these underlying issues early on can prevent more significant repairs down the line and ensure a secure, watertight seal.
2. Gather Tools and Materials
Before starting the repair process, make sure you have all the necessary tools and materials at hand. You will need new flashing material compatible with your roof type, roofing cement for sealing, and tools like a pry bar, utility knife, hammer, and safety gear like gloves and goggles. Having everything ready will allow you to work efficiently and avoid interruptions during the repair.
3. Remove Old Flashing
Carefully take off the damaged flashing, using a pry bar or utility knife to detach it from the roof. Be cautious not to damage the surrounding roofing materials during this process. As you remove the flashing, pay attention to how it was installed—note any overlapping sections or fastenings. This will serve as a helpful reference when you install the new flashing, ensuring that you replicate the proper installation techniques.
4. Install New Flashing
Once the old flashing is removed, start fitting the new flashing pieces around the chimney. Make sure to overlap the flashing adequately to prevent water infiltration. Secure the flashing in place using roofing nails or screws, ensuring it is tight against the chimney and roof surface. Apply roofing cement generously to seal any gaps or seams, which will help create a watertight barrier against the elements.
5. Test for Leaks
After installing the new flashing, it’s crucial to test for leaks to ensure the repair was successful. Use a hose or bucket to pour water over the flashing and watch closely for any signs of leakage. This step is vital as it allows you to identify and address any potential issues before they lead to significant water damage. If you find any leaks, adjust the flashing as needed or add more roofing cement to ensure a complete seal.
🛑 Preventing Future Issues
The best way to prevent future flashing issues is through regular maintenance, which includes inspecting your roof and flashing twice a year, with a focus on signs of wear. Keeping your roof clear of debris, such as leaves and branches, is essential as they can trap water and increase the risk of leaks; regular cleaning can help prevent this. Additionally, consider investing in high-quality materials, as they may be more expensive initially but often provide superior durability and a longer lifespan.
Choosing the Right Materials
When selecting materials for your flashing, it’s important to consider durability and compatibility with your roof. Aluminum is popular due to its affordability, while copper provides superior longevity. Ensure that the materials you choose can withstand your local weather conditions, and don’t hesitate to discuss options with a roofing professional if needed. Quality materials, combined with proper installation techniques, will offer the best protection for your home.
💡 Expert Tips for Effective Repairs

If you’re tackling flashing repairs yourself, keep a few tips in mind:
- Measure twice, cut once: This golden rule ensures a perfect fit. Taking the extra time to double-check your measurements helps prevent costly mistakes and ensures that the flashing aligns seamlessly with your roofing structure.
- Be thorough with sealing: Gaps can lead to leaks, so use roofing cement generously and ensure each layer of flashing overlaps correctly. Pay attention to corners and joints, as these are often the most vulnerable areas. A well-sealed flashing will provide long-lasting protection against the elements.
- Work safely: Use proper safety equipment and avoid attempting repairs in bad weather. Safety goggles, gloves, and sturdy footwear are essential to protect yourself. Additionally, wait for clear weather to minimize the risk of slips or falls while working on your roof.
A steady roof is essential for effective repair work, as it not only supports the flashing but also contributes to the overall integrity of your home. Regular maintenance can save you time and money in the long run.
🙌 Protect Your Home with TriStar Roofing
In ensuring the longevity and effectiveness of your chimney flashing, it is crucial to address necessary repairs promptly and with care. Whether you choose a professional repair or a DIY approach, taking the right steps can prevent costly damage in the future. At TriStar Roofing and Exteriors, our team is committed to providing expert roofing solutions with reliability and integrity. We offer a community-focused approach and take pride in delivering high-quality service tailored to meet your specific needs. Trust us to care for your home with precision and dedication. Don’t wait for small issues to become significant problems—contact us today for a consultation, and let our experienced professionals protect your home for years to come.
